

What is a mood board? It is a visual representation or collage of ideas often used by professionals such as interior designers to communicate a project. It captures the desired style, mood and aesthetic of a space. The collection and organization of various elements such as colors, textures, patterns, materials, furniture, and accessories serves as a tool to communicate overall design concepts.
Interior designers often create mood boards as a starting point in the design process, allowing them to visually explore different possibilities and experiment with different combinations before finalizing the design plan. Mood boards can be physical or digital, depending on the designer’s preference.
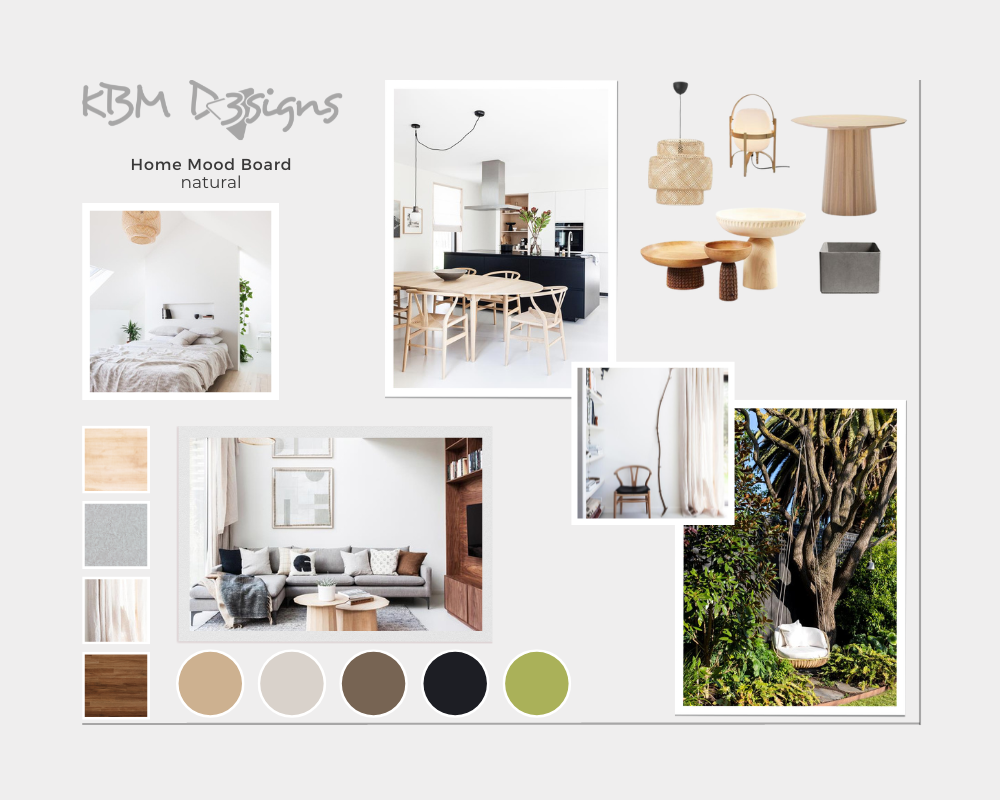
By compiling images, fabric swatches, color swatches, material samples, and other visual references on a mood board, designers communicate their vision to clients, collaborators, and contractors in a clear and concise manner. Mood boards help stakeholders visualize how different elements come together, ensuring everyone is on the same page and reducing the potential for miscommunication.
Overall, a home decor mood board acts as a creative roadmap, providing a visual reference and inspiration for the interior design project while helping to maintain a cohesive and unified design direction.
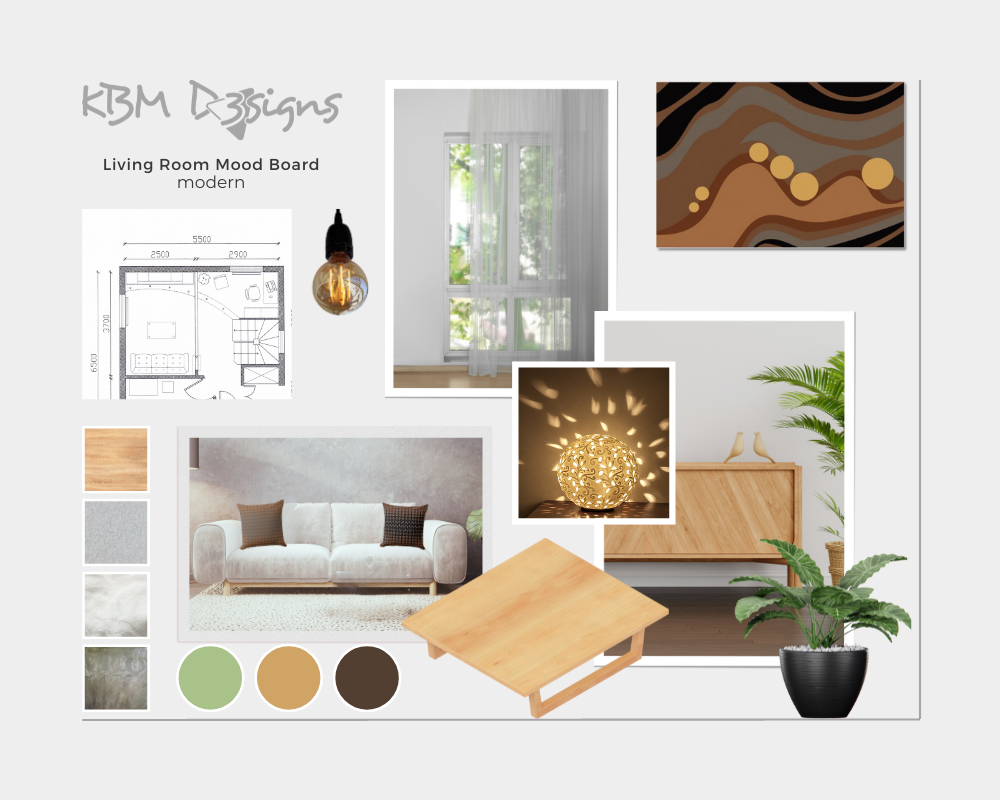
Getting Started and Creating a Living Room Mood Board
Creating a mood board for a room is a fun and creative way to visualize your design ideas and create the desired ambiance. When I was studying interior design, we used to look at magazines for material samples and visual ideas. Today, it is much more common to create an online mood board to generate design ideas. Both approaches are fun and allow you to establish a general vision for style, color and texture.
Here in the article we explore:
- A step-by-step guide to creating an interior design mood board for the living room
- How to use Pinterest to narrow down ideas and styles in an online mood board
- The difference between using Pinterest and Canva, and the strengths of each and their potential for collaboration
Use the above template on Canva!
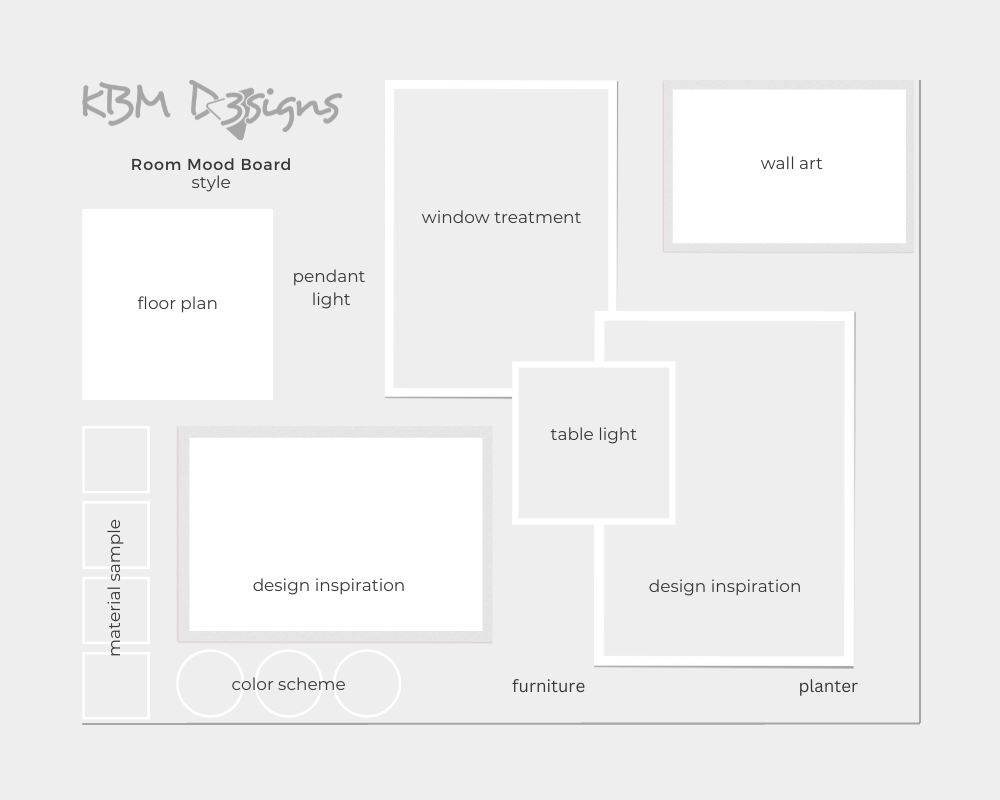
How to create a mood board step by step?
1. Define your style
2. Gather materials
3. Choose a color palette
4. Find pictures or sketches of furniture pieces and decide on overall space layout
5. Collect images of lighting fixtures, lamps
6. Experiment with different textures and materials
7, Once you have all your materials, start arranging the board
8. Add notes and labels
9. Refine and finalize
10. Take action!
A step-by-step guide to creating a mood board for a living room:
Of course, the steps apply to any room you want to create a working mood board for.
Define Your Style
Start by identifying the style or theme you want for your living room. Browse magazines, online platforms like Pinterest, or interior design websites for inspiration and to identify the elements that resonate with you.
Gather Materials
Gather a variety of materials to create your mood board. You’ll need a cork board, poster board, foam board, or even a digital platform like Canva or Pinterest. In addition, gather materials such as fabric samples, paint swatches, wallpaper samples, magazine clippings, photos, and any other visual elements that represent your desired living room style.
Color Scheme
Choose a color palette that will set the tone for your living room. Consider colors that complement each other and create the mood you want. Collect paint swatches, fabric samples and images in these colors to include on your mood board.
Furniture and Layout
Find pictures or sketches of furniture pieces and the overall layout you want for your living room. Include these on your mood board to visualize how the furniture will fit and interact with the space.
Lighting and Accessories
Research and collect images of lighting fixtures, lamps and other accessories that match your desired style. Include these on your mood board to understand how they will enhance the overall aesthetic.
Textures and Materials
Experiment with different textures and materials to add depth and visual interest to your living room. Collect samples of fabrics, wallpapers, wood finishes, or flooring options that reflect the textures and materials you want.
Arrange and Layer
Once you have gathered all your materials, start arranging them on your chosen board. Start with the larger elements, such as furniture, and layer the other materials on top. Experiment with different arrangements until you find a composition that visually represents your vision for the living room.
Add Notes and Labels
Consider adding labels or notes to your mood board to highlight specific elements or provide explanations for your choices. This can help you communicate your ideas more effectively.
Refine and Finalize
Step back and evaluate your mood board. Make any necessary adjustments or refinements to ensure it accurately reflects your desired living room style and mood.
Take Action
Now that your mood board is complete, use it as a reference as you shop for furniture, decor, wall art and materials. It will help you make informed decisions and ensure that all of the items you select are in line with your desired vision for your living room.
Remember, the purpose of a mood board is to inspire and guide your design decisions, so feel free to be creative and experiment with different ideas until you find the perfect combination for your living room.
Creating an Online Mood Board and Its Benefits
Pinterest is a popular and convenient way to gather inspiration and visualize your design ideas as you gather ideas for your living room mood board. Best of all, you can share your ideas with friends and ask them for their input by pinning or commenting.
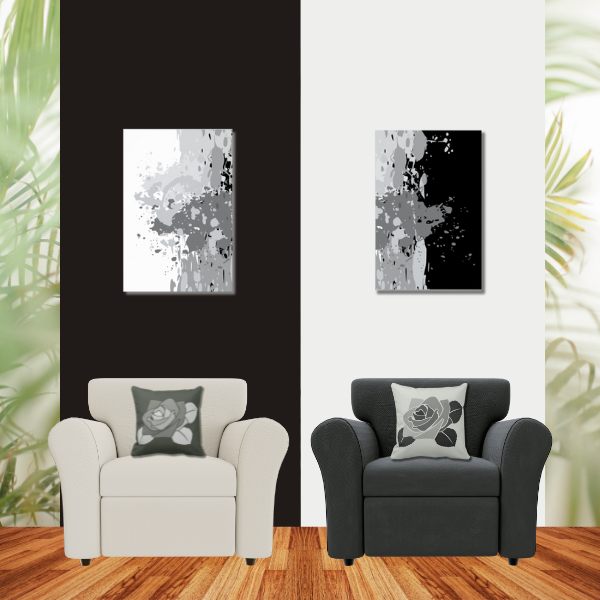
@KBM D3signs created a sample living room mood board. Follow us, share and give us your insights. We love to get and give feedback.
Here are some tips to help you start an effective Pinterest mood board:
Create a New Board
Start by creating a new board specifically for your living room. Give it a clear and descriptive name that reflects the style or theme you’re going for.
Define your Style and Keywords
Before you start searching on Pinterest, clarify the style or theme you want for your living room. This will help you narrow your search and find relevant inspiration. Make a list of keywords that represent your desired style, such as “modern living room,” “bohemian decor,” or “coastal design.
Browse and Pin
Start searching for images, articles, and blog posts that match your style and keywords. Pin images that catch your eye and align with your living room vision. Look for a variety of pins that showcase furniture, color schemes, wall art, accessories, lighting, textures, and overall room layouts.
Organize your Pins
Once you’ve collected a significant number of pins, start organizing them on your board. Create sections or subboards within your main mood board to categorize different elements such as furniture, color palettes, lighting, and textures. This will make it easier to find specific inspiration when you return to your board later.
Be Selective and Curate
While it can be tempting to pin everything that looks appealing, be selective and curate your board. Choose images that truly represent your desired style and mood for the living room. Aim for a cohesive and balanced collection of pins that work well together.
Mix and Match
Experiment with mixing and matching different pins to see how they complement each other. Try juxtaposing different pieces of furniture, color schemes, and accessories to get a sense of how they would work together in your living room.
Add Descriptions and Notes
Pinterest lets you add descriptions to your pins. Use this feature to add notes or comments that explain why you pinned a particular image or how it fits into your living room vision. This can be helpful for future reference or when sharing your board with others.
Collaborate and Get Feedback
If you’re working on a design project and want to get input from friends or professionals, you can invite them to collaborate on your Pinterest board, which becomes a group board. Once invited and accepted, they can contribute their own pins, add notes and leave comments. It becomes a collaborative and interactive space for design discussions.
Update and Refine your Living Room Mood Board
As you gather more inspiration and ideas, don’t be afraid to update and refine your mood board. Remove pins that no longer align with your vision or add new ones that better represent your evolving design concept. Keep your board dynamic and reflect your latest inspirations.
How to use your mood board once it is complete
Once your Pinterest mood board is complete, use it as a reference when shopping for furniture, lighting, home decor, wall art and materials. Pinning specific products or links can help you find them later when you’re ready to make purchases or dive into the actual design process.
Remember, Pinterest is a vast platform with endless inspiration, so take your time and enjoy the process of exploring and curating your living room mood board.
When creating a digital mood board, what is the difference between Pinterest and Canva?
Pinterest and Canva are both popular mood board tools, but they have some key differences in functionality and purpose. Here’s a breakdown of the differences between using Pinterest and Canva to create a mood board:
Content and Mood Board Inspiration
Pinterest is a visual discovery platform where users can search and save images, articles and links from across the web. It allows you to create boards and pin content that inspires you. Pinterest is a great way to gather inspiration from a variety of sources, including photos, magazine clippings, blog posts, and more. You can explore an extensive library of user-curated pins and follow specific topics or users for ongoing inspiration.
Canva, on the other hand, is a graphic design tool that offers a wide range of templates and design elements. It provides a platform for creating custom designs, including mood boards. While Canva does offer some stock images and illustrations, it focuses primarily on design customization and creation rather than curating external content.
Customization and Design Tools
Pinterest has limited customization options. You can arrange and organize your pins within boards and sections, but you can’t extensively customize the layout or design of individual pins. The focus is on collecting and curating content rather than manipulating design.
Canva, on the other hand, offers extensive customization tools and design features. It offers a wide range of templates, fonts, colors, and design elements that allow you to create visually appealing and personalized mood boards. Canva also gives you the flexibility to arrange and resize images, add text, overlay graphics and adjust layouts to match your design vision.
Collaborate and Share
Pinterest is a highly social platform that makes it easy to collaborate and share your boards with others. You can invite others to contribute to your boards, leave comments, and follow boards created by others. This makes it ideal for sharing design ideas and collaborating with clients, friends or other team members.
Canva also allows for collaboration and sharing, but typically requires more manual sharing and collaboration methods. You can invite others to edit your designs or share the final mood board as an image or PDF. Canva is a better choice if you prefer more control over who can access and edit your mood board.
Output and Usage
Mood boards created on Pinterest are typically used as visual references or inspiration galleries. You can save, organize, and access your pins from anywhere with an Internet connection. However, the output is primarily digital and you may need to switch to another platform or tool for further editing or printing.
Canva allows you to create mood boards with specific dimensions and export them in various formats such as PDF, image files or even print-ready formats. This makes it easier to share your mood board digitally or print it for presentations, design boards or client meetings.
In summary, Pinterest is a powerful platform for collecting and curating visual inspiration from various sources, while Canva offers more design customization options and flexibility. Consider your specific needs and preferences when deciding which tool to use to create your mood board. You can also use both platforms in combination, for example, collecting inspiration on Pinterest and then importing those images into Canva to create and refine your mood board.
FAQs: Pinterest vs. Canva for Mood Boards: Choosing the Right Tool for Your Creative Vision
Pinterest is primarily a visual discovery platform where you can collect and curate images and ideas from various sources, while Canva is a graphic design tool that offers customization options and templates for creating your own designs. Pinterest is more focused on inspiration collection, while Canva provides design flexibility.
Consider your specific needs and preferences. If you prefer a platform for gathering and organizing visual inspiration, Pinterest is a great choice. If you want more design control and customization, Canva is the better option. You can also use both platforms together; for instance, start with Pinterest to collect inspiration and then transfer images to Canva for detailed design work.
Using both platforms in combination allows you to leverage the strengths of each tool. Pinterest helps you collect diverse inspiration, and Canva enables you to fine-tune the design, layout, and customization of your mood board. This combination offers a comprehensive approach to creating visually stunning and personalized mood boards that can be shared digitally or in print.

-
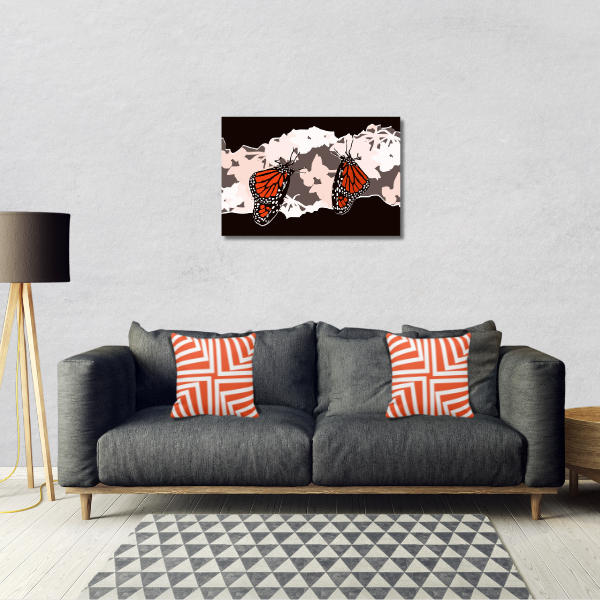
Butterfly Wall Decor- Enchant Your Home with Symbolic Elegance
Read the post …: Butterfly Wall Decor- Enchant Your Home with Symbolic Elegance -

Modern Purple Wall Art: Shades, Combinations, And Their Impact
Read the post …: Modern Purple Wall Art: Shades, Combinations, And Their Impact -
Splatter Art: A Fun and Colorful Way to Express Yourself
Read the post …: Splatter Art: A Fun and Colorful Way to Express Yourself -
Blue and Yellow Wall Art a Dance of Complementary Forces
Read the post …: Blue and Yellow Wall Art a Dance of Complementary Forces -

Set of 4 Art Prints, What is Their Magic to Enchant Your Living Space?
Read the post …: Set of 4 Art Prints, What is Their Magic to Enchant Your Living Space? -
Blue and Green Wall Art, Enchanting Allure in Home Decor
Read the post …: Blue and Green Wall Art, Enchanting Allure in Home Decor